


With the WordPress module you can easily interact with your blog in Mailify, import content from your blog in your newsletter, access your media gallery, synchronize your WordPress users and your newsletter opt-in contacts.
Step 1 - Go to your Wordpress Dashboard
The module works from the version 4.1.1.6.
Connect to your administration panel and click on ‘Plugins’
Step 2 - Install the plugin
To install the Wordpress plugin, carry out the following steps:
1. Download the plugin here, click on "Upload Plugin" and follow the instructions.
2. Click "Activate Plugin"
3. A new Mailify menu will now be available on the menu to the left. Click on 'Interconnect' and then, 'Generate a new key':
4. The generated key must be added to Mailify. Click on ‘Settings’ from the left menu:
In this step you choose which elements will be synchronized with Mailify:
Lists synchronization
- SYNCHRONIZE A LIST WITH "WORDPRESS USERS": Create a list in Mailify named ‘WordPress users’ including all users who have registred an account on your blog or website.
- SYNCHRONIZE A LIST WITH "NEWSLETTER OPT-IN": Enable the ‘Widget’ section in the left menu. In this section you can create a new contact form to collect newsletter opt-in in Mailify. The list will be reachable only in Mailify.
Advanced settings
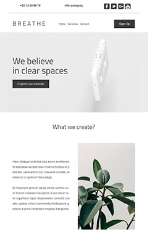
- SYNCHRONIZE WORDPRESS THEME: Import the four main colors of your blog in Mailify’s Email Builder.
- SYNCHRONIZE BLOG POSTS : Import your article content into any EmailBuilder modules.
- SYNCHRONIZE MEDIAS GALLERY: Import your media gallery elements in Mailify’s Email Builder.
- SYNCHRONIZE RSS: Your blog will be available as a source in the Email Builder’s RSS module.
Once your settings are selected, click on "Save".
Step 3 - Activate the extension in Mailify
To activate the WordPress extension, access the extensions dashboard by clicking on the extensions tab

1. Click the button to activate the extension:
2. When you see the settings pop-up, click ‘Add a website’ :
3. Input the connection info provided in the WordPress admin page:
- a. Name of the website: For identification in your contact lists
- b. URL : Address of your WordPress website, found in the Mailify plugin settings page in the WordPress admin
- c. Activation key : Key provided through the plugin in the WordPress admin.
4. Finish the form by pressing confirm. Your WordPress website is now connected to Mailify. The synchronization of elements will then begin.